
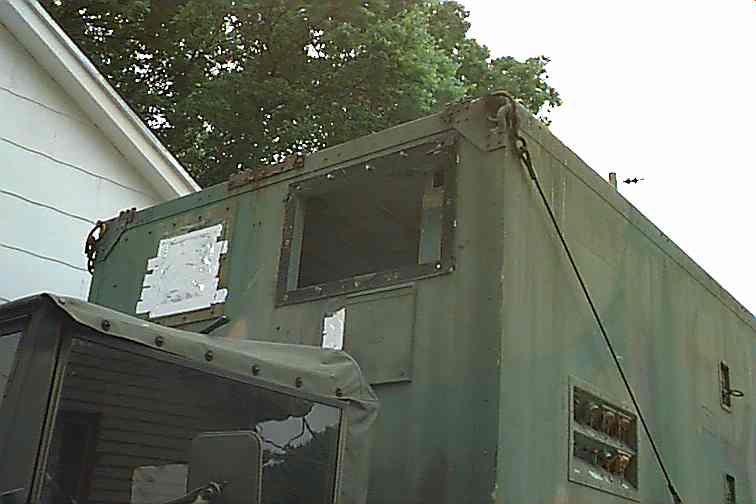
The image shows the front of the vehicle with shelter. The drivers side hatch is complete, whereas the passenger side hatch has an opening cut into it. This was later sealed.
The purpose of air conditioning in a military communications shelter is for proper operation of the electronics equipment.
The common shelter as found on an M-35 "deuce and a half" truck has two hatches on the front, near the top. These are two large metal plates which are bolted to the front of the shelter, each covering a framed hole which is 15.2" high by 26.2" wide. The shelter wall is about 2" thick, and is made of what seems to be 1/16" aluminum with foam insulation inside. The frame around the hole seems to be made of aluminum which is about 3/16" thick.
The image shows the front of the vehicle with shelter. The drivers side hatch is complete, whereas the passenger side hatch has an opening cut into it. This was later sealed.
If you visit your local National Guard Armory, you may see these shelters on the M35 trucks, with military-spec "window" air conditioners mounted into them.
This said, the military air conditioners of this type are hard to find, expensive, heavy, and often require 3-phase 400Hz power. They also fit the hatch perfectly and are arranged so that the air blows into ducts built in to the interior of the shelter. You win some you loose some.
Since we did not find a ready supply of these air conditioners for the shelter, we decided to use a standard commercial window air conditioner. After a suitable recon, a "hunter bay" unit was selected from Home Depot. This is their store brand and seems to be made just like a G.E. unit. The unit was selected for 8000 BTU, and a height of 14". The unit weighs 65 Lbs. and the guts slide out from the front for maintenance if you remove the front panel.
The hatch removal proved to be difficult, as the external bolts were rusted and the previous owner had tried unsuccessfully to remove them. In such a shelter, the majority of attachment bolts are held in place by "blind nuts", which are similar to rivets, but with threads like a nut. When the bolts rusts into the nut, the attempt at removal will 'spin' the nut in its hole, and render the bolt non-removable. We used a reciprocating saw ("sawz-all") to cut the heads off, and then once the panel was off, cut the shanks of the bolts flush with the face of the shelter wall.
The image show the open hatch, with the cover removed.
After finding the center of gravity of the unit, which was found to be 9" back from the front of the metal casing (plastic grille removed), the casing was mounted so as to place the center of gravity as close as possible to the hatch frame. This positioning is designed to reduce the stress on the unit and mountings as the M-35 truck bounces down the trail on its very stiff suspension. The last thing we wanted was to hit a bump and have the air conditioner come out of the hatch and down through the soft top on the cab. This positioning placed the air conditioner approximately 4" farther into the shelter space than would be expected if it were mounted per the usual window mounting scheme.
In order to accommodate this positioning, the equipment shelf assembly on one side of the shelter body was removed.
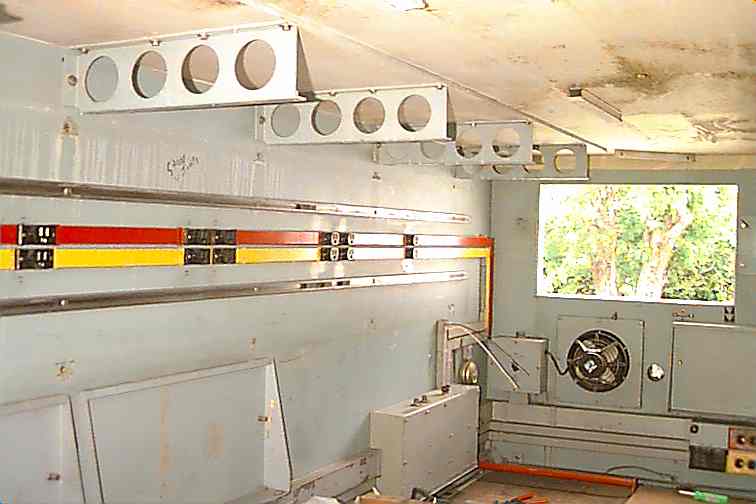
The image shows the space where the shelf was, and the open hatch.
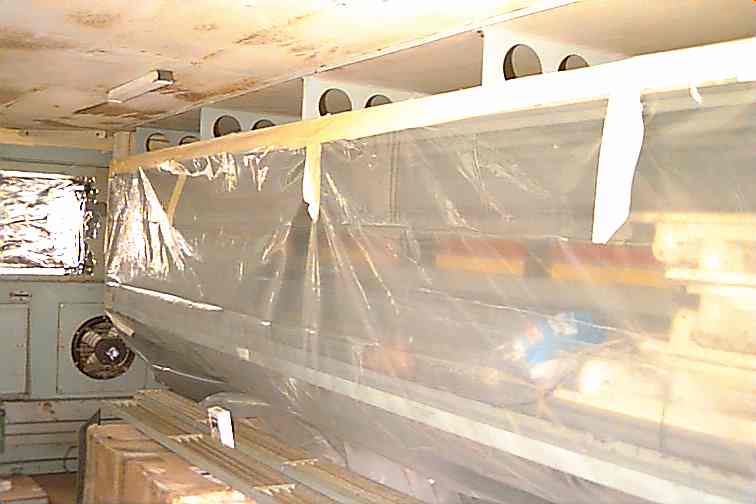
The image shows the other shelf, covered with plastic sheet in preparation for cleaning and repainting of the ceiling. Although it is difficult to see, there is only 9" of space between the bulkhead at the forward end of the shelving and the hatchway.
The ceiling brackets were left in place so that a sheet of metal could be attached to them later to provide storage space.
Details of the mounting method are as follows:
The case of the air conditioner was positioned and attached at the bottom by four #14x1" sheet metal screws with lockwashers. The right side of the case was placed against the right side of the hatch frame.
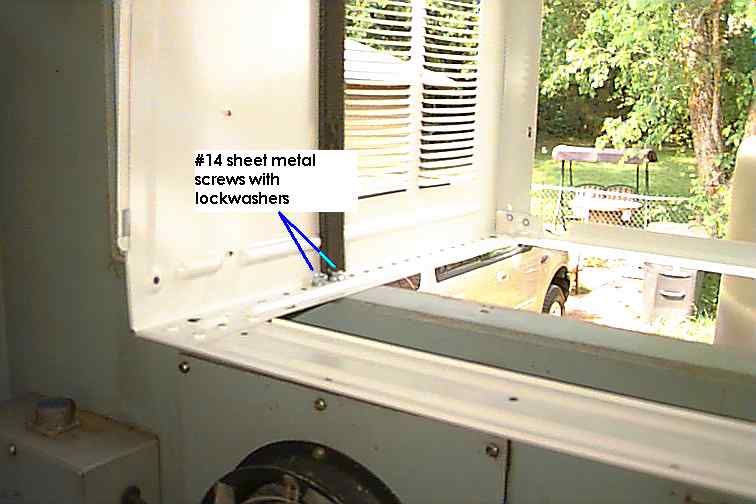
The image shows the hex-head #14 sheet metal screws, with lockwashers, fastening the frame rails of the case to the hatch frame. The large heads of these screws make sliding the cooling unit in and out somewhat difficult, but it was eecided that the largest possible fasteners should be used in order to maximize the safety of the installation.
Two #10 machine bolts were placed in the side of the casing, and through one side of a 1.5"x1/8" aluminum angle stock which was 15" tall. The angle stock was drilled to allow it to be attached to two pre-existong studs mounted in the shelter front wall.
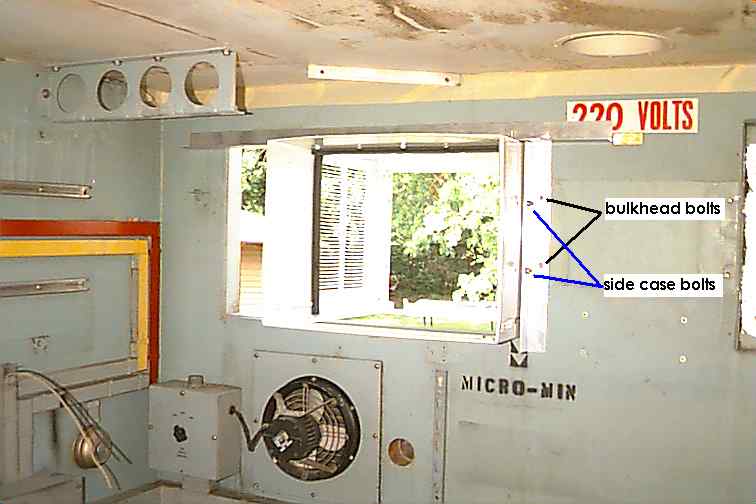
The image shows the 1.5"x1.5" aluminum angle which is secured to the inside of the front bulkhead by two pre-existing bolts. The side of the case is secured to the angle by two bolts with lockwashers, ans since there was a small gap of approximately 1/8" between the angle and the air conditioner case, two flat washers were inserted between the angle and the case.
Five #12 sheet metal screws were passed through the top of the case, and through a 30" section of aluminum angle stock which was 1.5" wide and 1/8" thick. The upright angle of this stock rests against the inside front bulkhead of the shelter. This piece supports the forward thrust of the air conditioner case when the cooling unit is installed. It was attached to the front wall with two #12 sheet metal screws. Note that the metal of the front wall is quite thin (1/16"), and the screws just keep the angle stock from moving laterally, they do not support much reverse thrust.
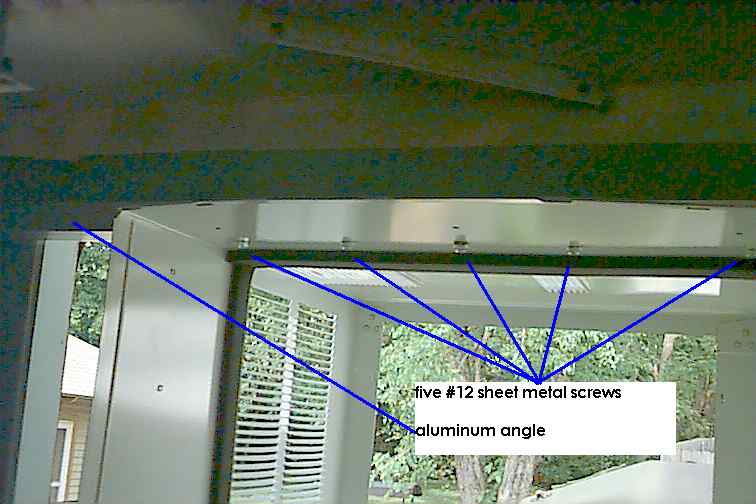
The image shows the sheet metal screws securing the top surface of the case to the aluminum angle stock.
There was an 8" air gap on the left side of the air conditioner case. While the case, now fastened on three sides, is very secure, the gap had to be closed to keep the cool air in, hot air out, etc. A piece of sheet steel from a junk piece of electronics equipment was trimmed to size and buts against the side of the A/C case, and overlaps the wall of the shelter by about 2". This was secured by several #12 sheet metal screws.
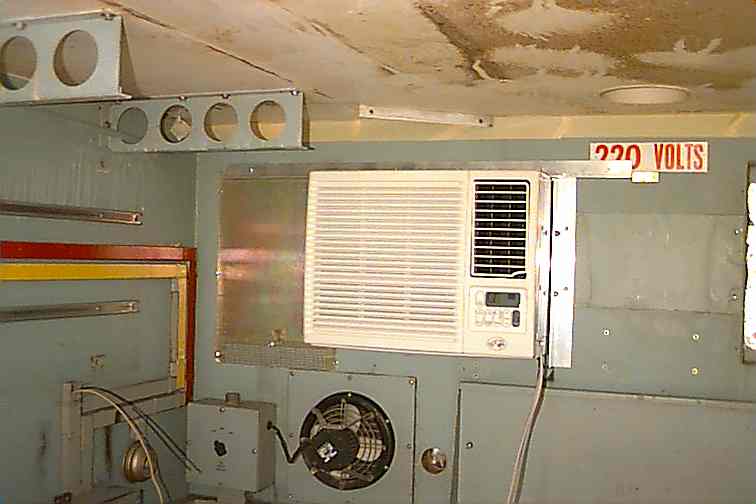
The image shows the completed mechanical installation. It remains to install insulation and sealant around the case and forward of the sheet steel.
A road test was made, and the A/C remains firmly mounted. Some camo paint on the exterior of the A/C case did the final job, and the radio gear will now stay cool.