Skywire Miner at Bunker of DOOM: Hardware for the Next Internet
(2018 03 15)

A new project for 2018: assemble an operate a skywire miner.

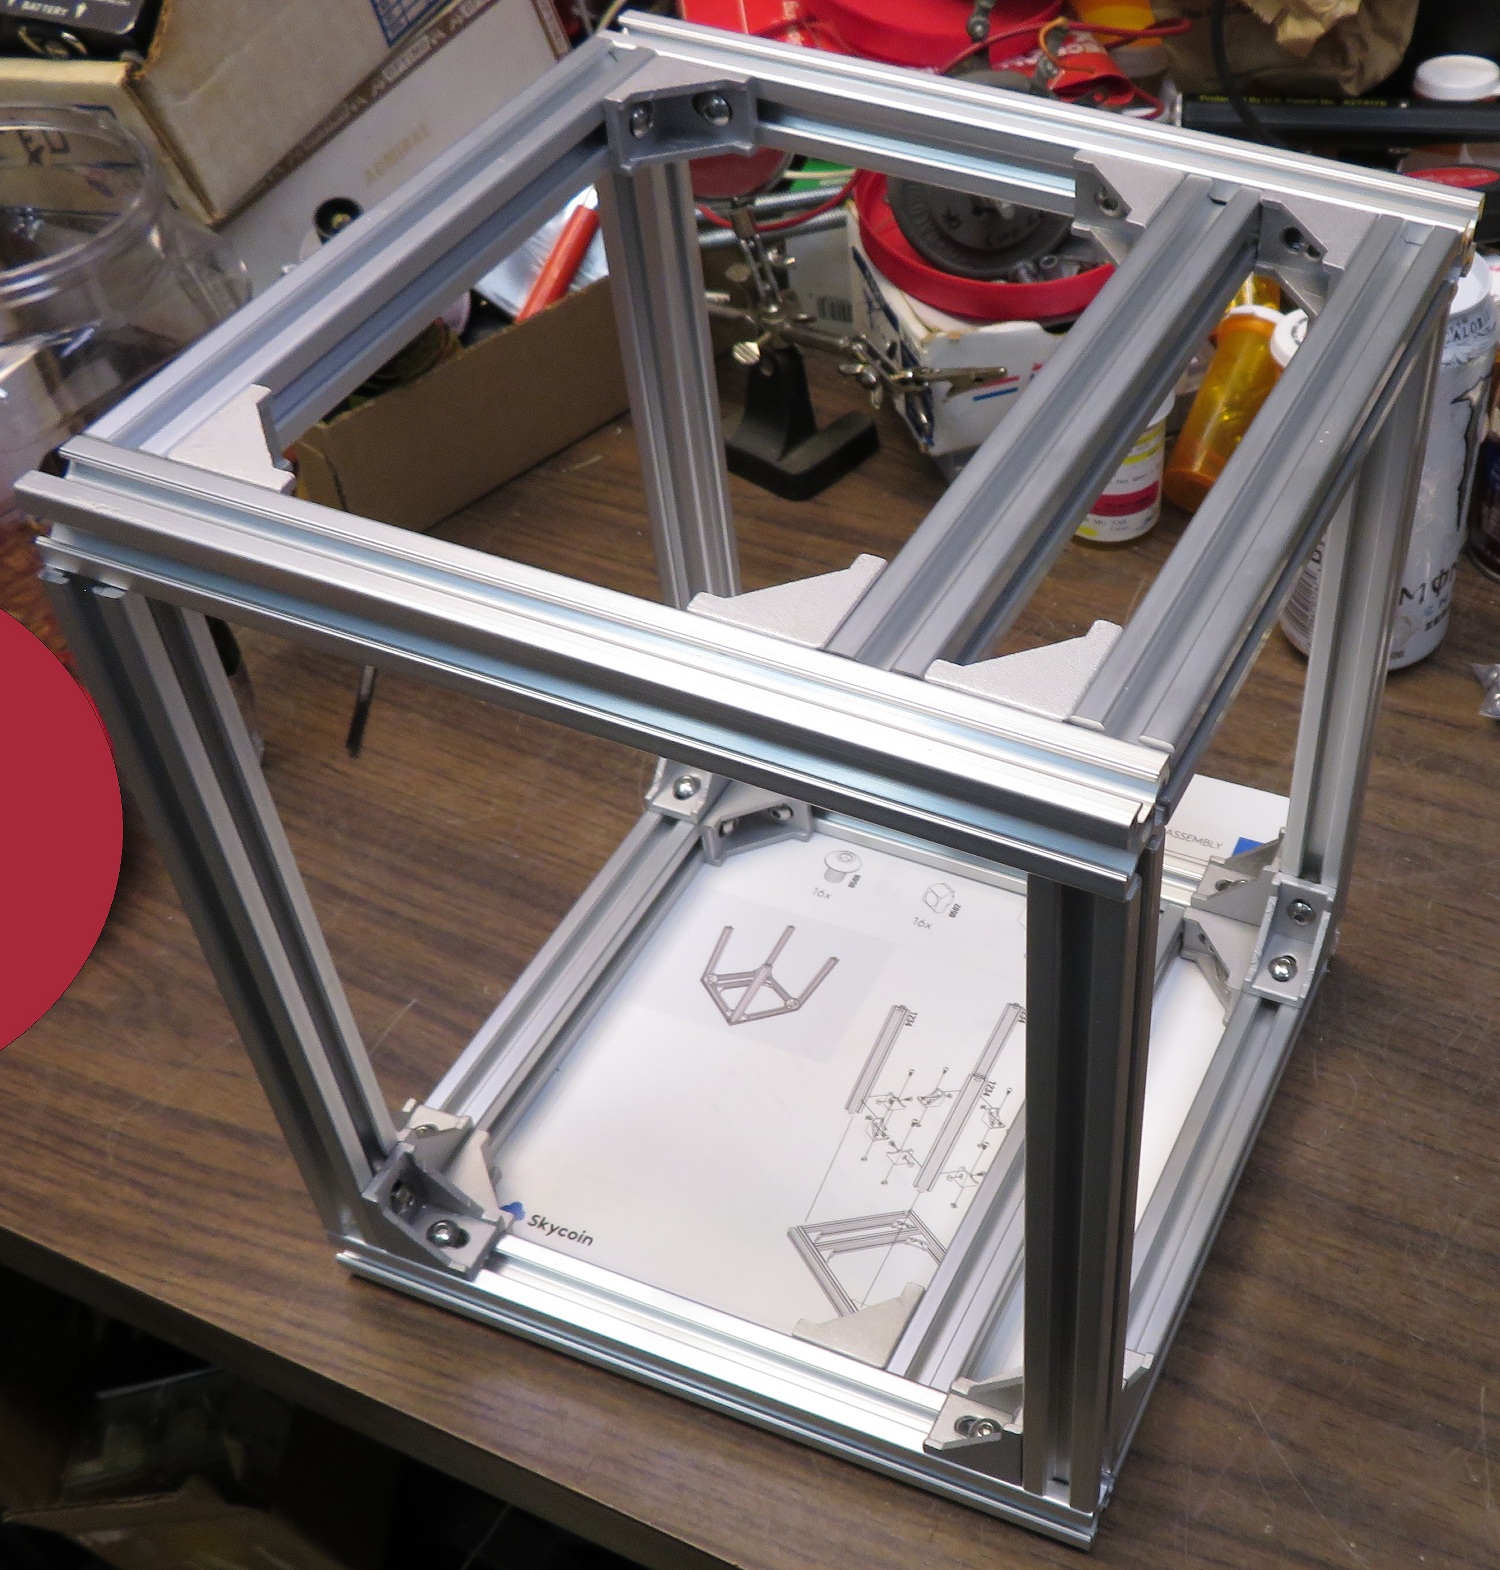
After a few weeks it's finally here. The cost was 1BTC, of which all but about $600 worth was returned in the form of sky crypto. The product is a complete kit, meaning 100% complete and must be completely assembled. Software is not included but is available online. See https://www.skycoin.net/ .

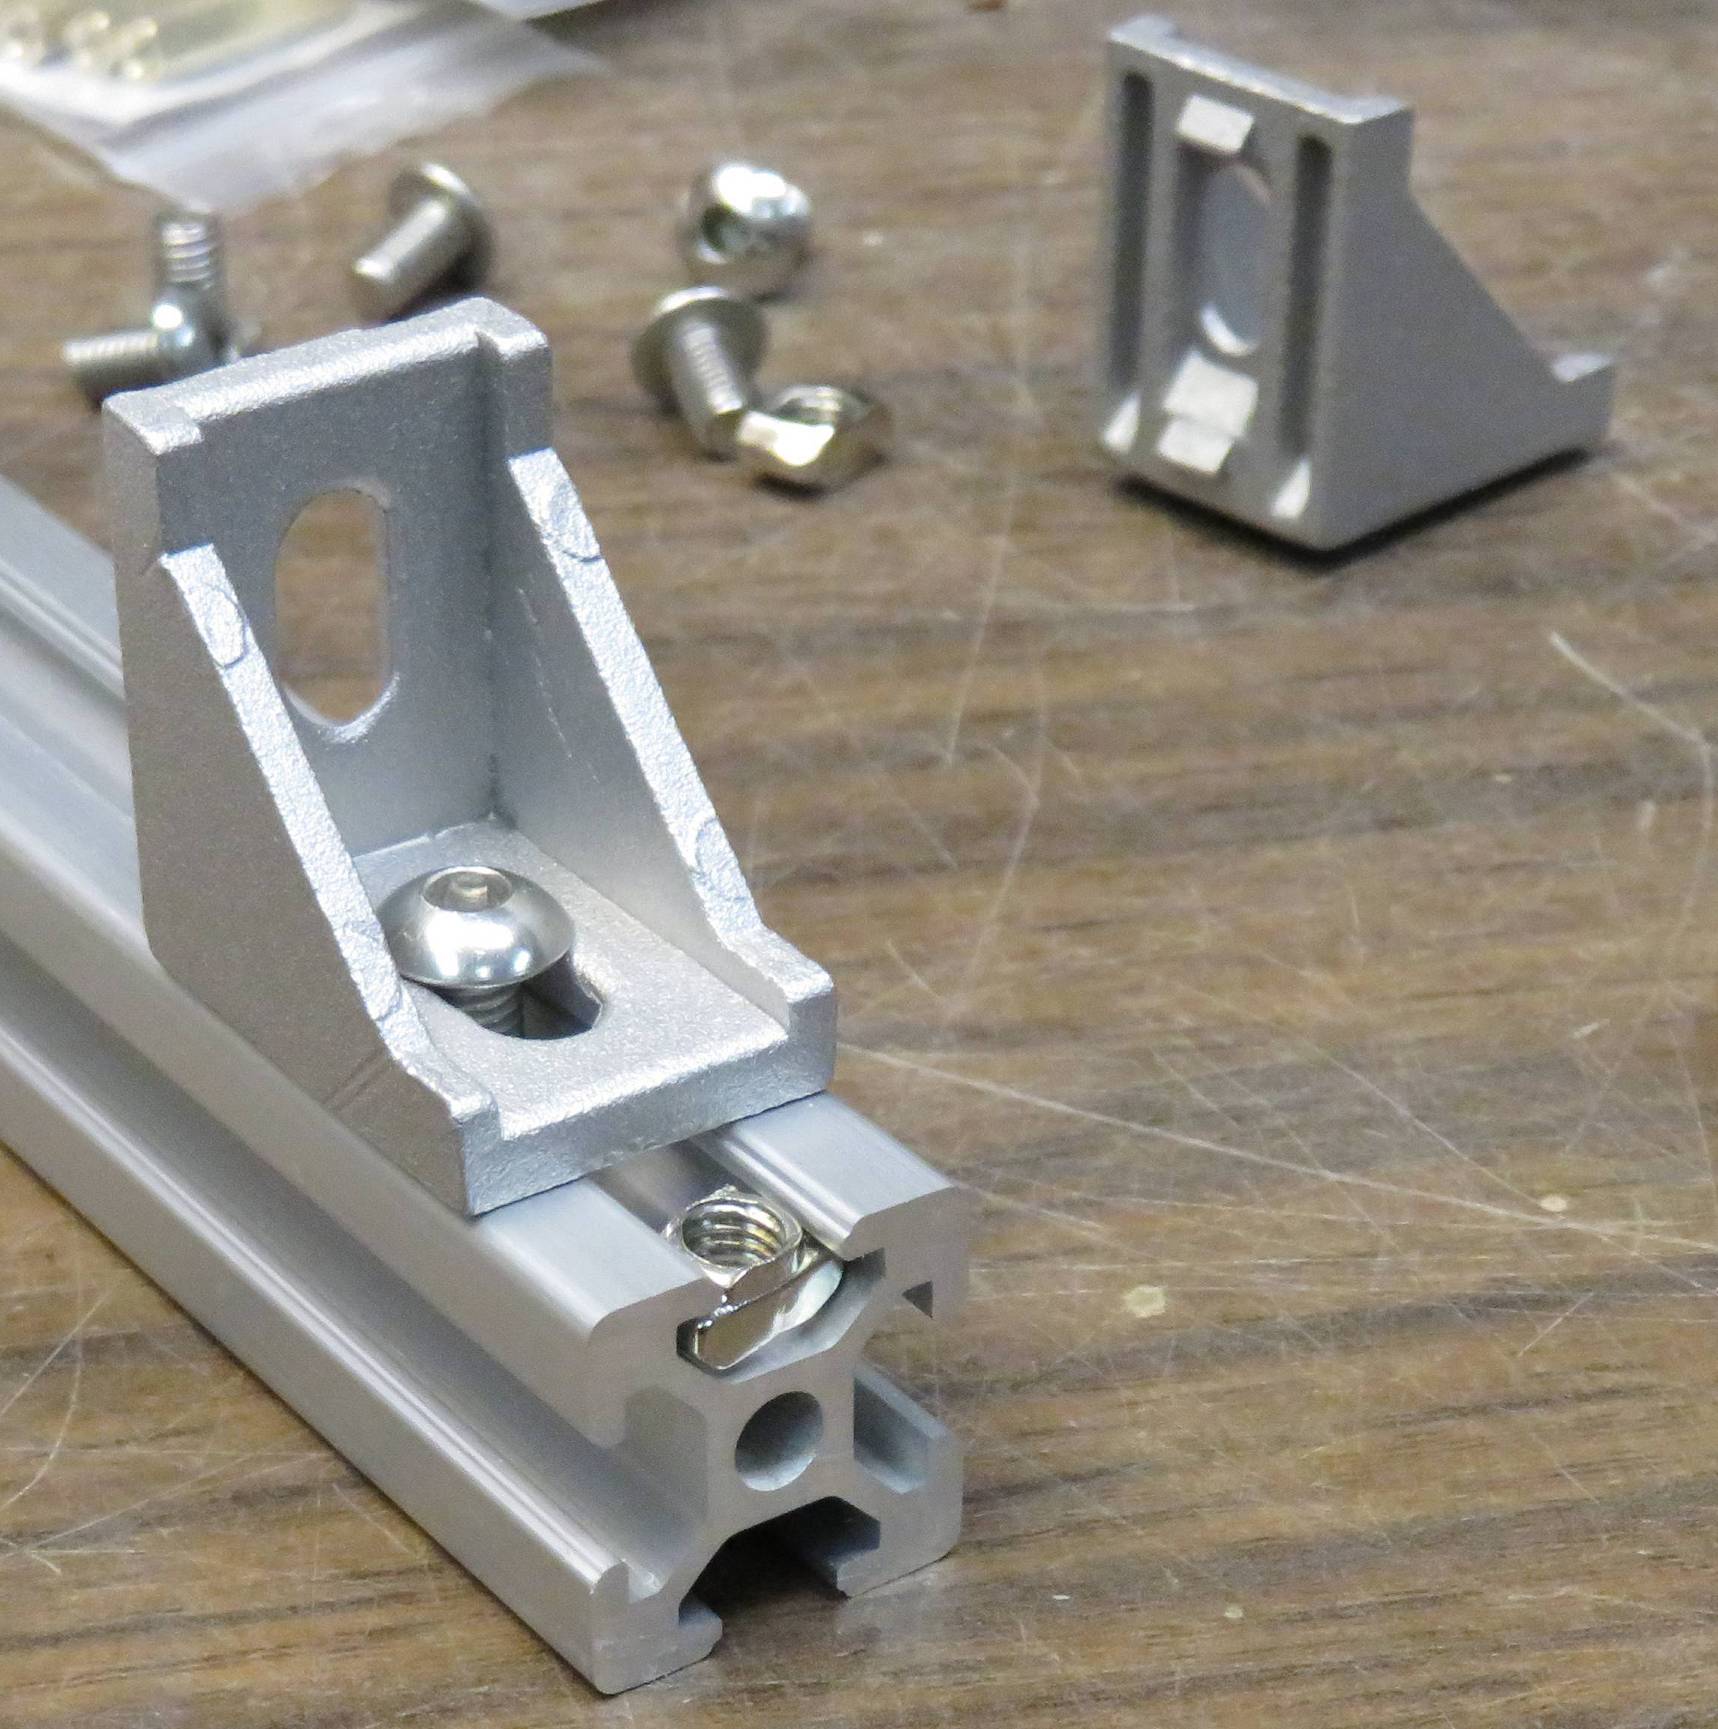
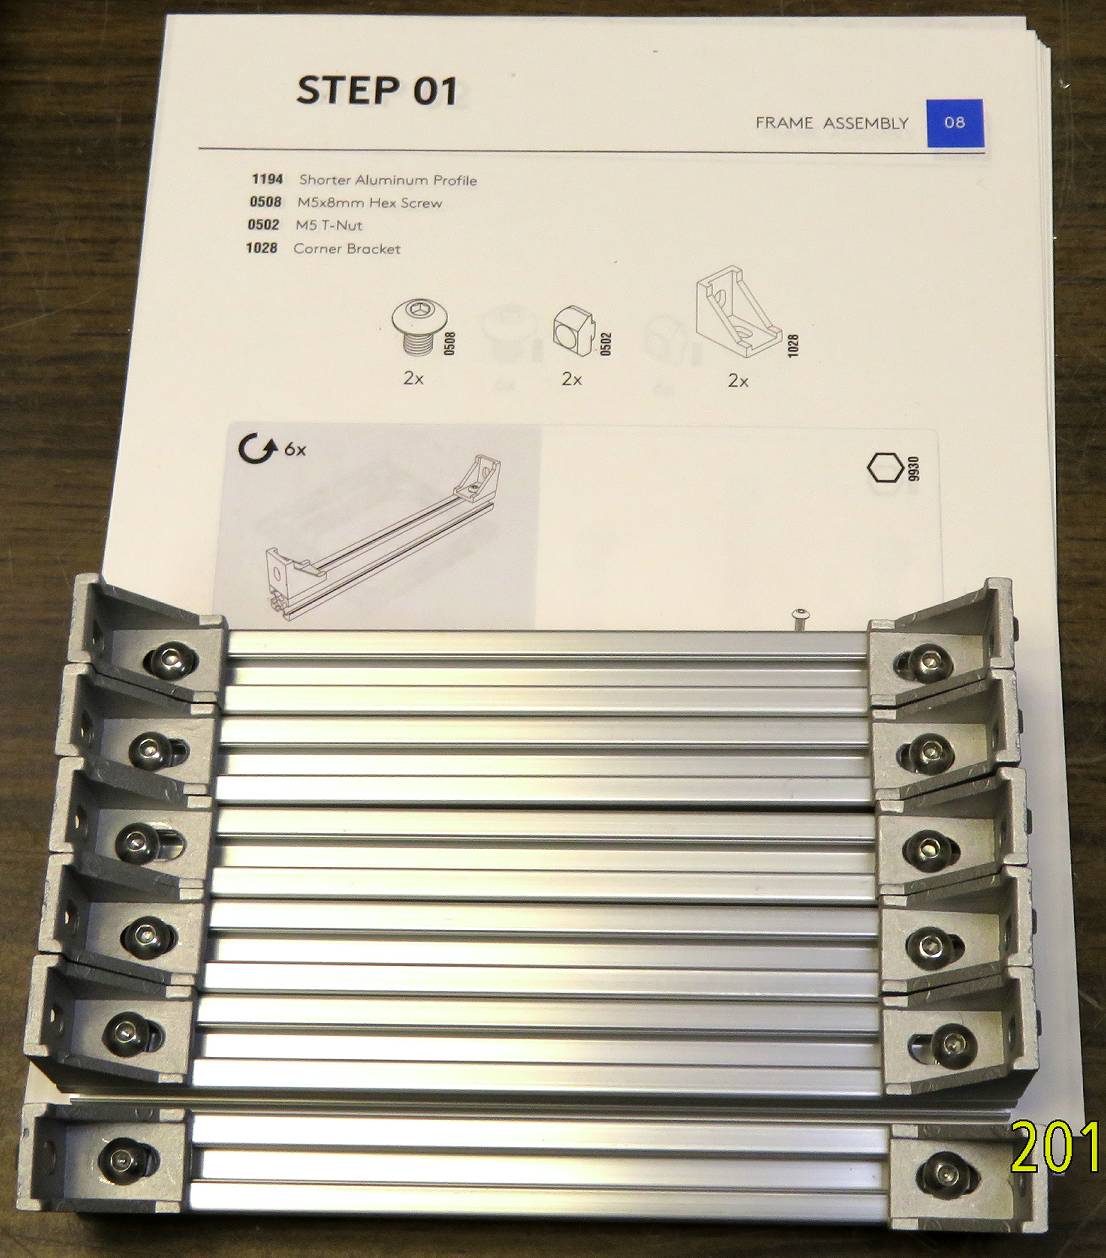
It contains all parts and assemblies required, including two hex wrenches and a nutdriver. Each package of hardware is individually marked with a number label and these are referenced in the 30-page instruction/assembly manual. There is little text once the main portion of the manual is entered, but many good drawings.

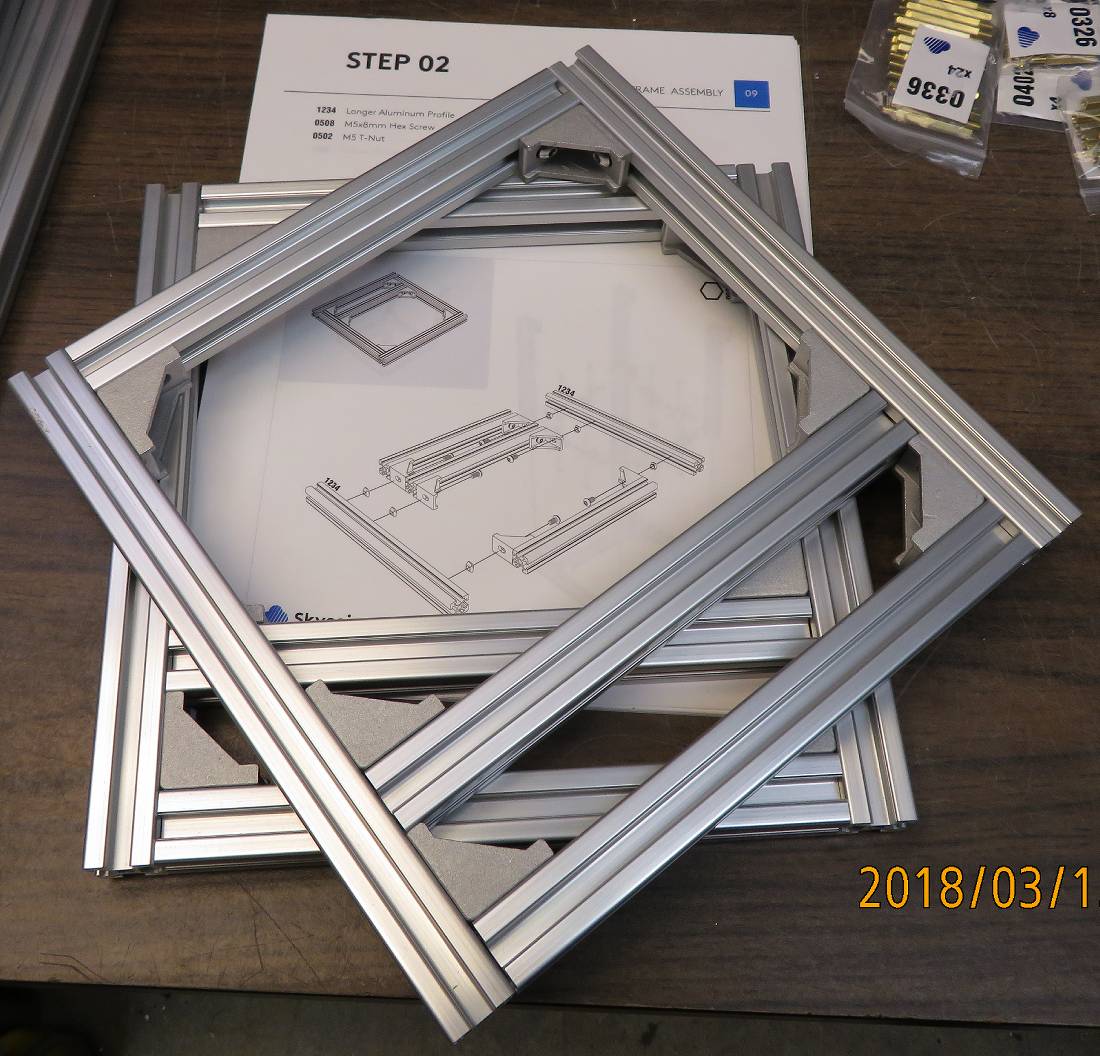
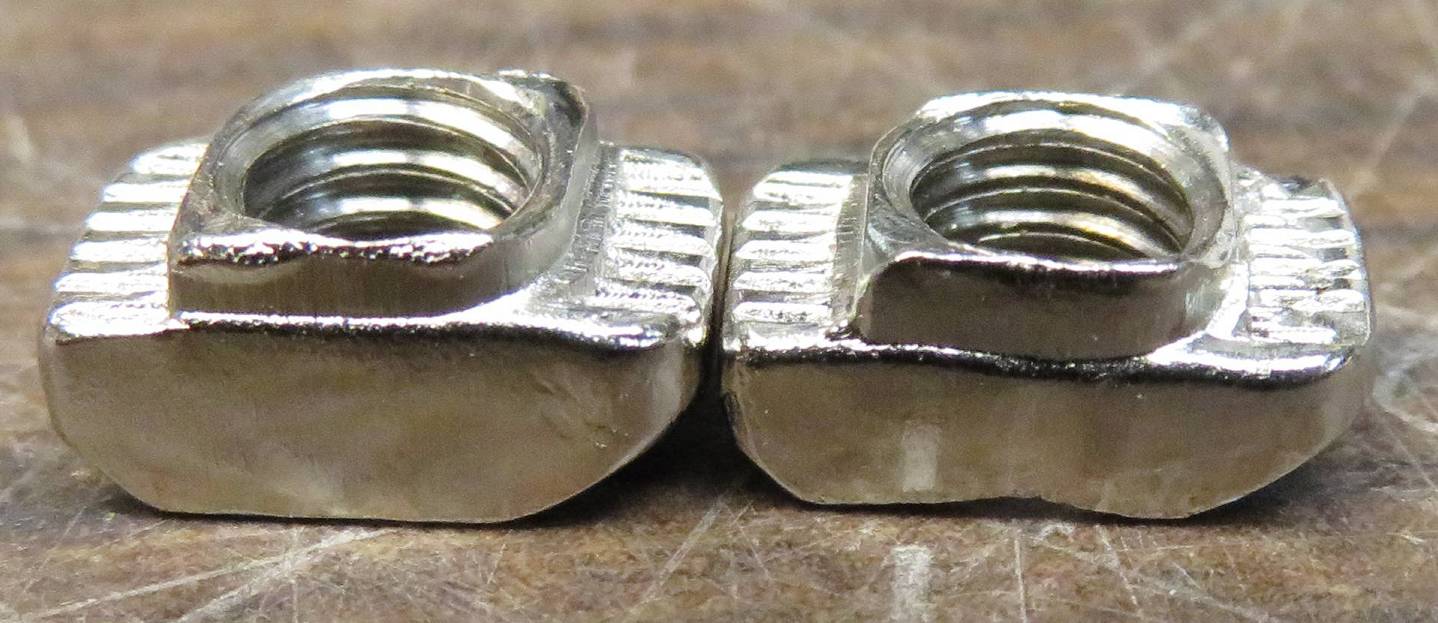
There seem to be a few discrepancies. One example is STEP 02, which shows assembling part of the frame. The exploded drawing is subtly different from the smaller inset final/completed image for the step. We assembled ours according to the exploded view, after reading ahead (again) to see what difference it might make. Another discrepancy is with the small nuts which fit in the slots of the extrusions. Some of them are very tight due to being out of spec or too large to slip right in, and so in instances where the builder should insert the nut into the extrusion channel and rotate it 90 degrees, the rotation may not be possible.

We recommend that all nuts be inspected by test-fitting them into the channels. We were able to tap the too-tight nut into the channel with a small rod. During some phases of frame assembly, a channel-end will be closed off by another extrusion. We suggest that the 'tight' nuts be saved for channel ends which will be open.

It would be nice if these fasteners were of better quality, more uniform. The screws which fit into the nuts are a somewhat soft metal and the hex will strip if tightened too much, so there is a definite balance between a gentle hand and a loose assembly. Size discrepancies and softness in fasteners are not what we are used to here. The bolts may be approximately equivalent to Grade 2, a consumer type.

Once the frame is assembled, we may put a drop of cement on each to stave off loosening due to frame flexure. Overall, it is well to leave them a little loose until the frame is complete and then use a soft deadblow hammer to tap it into perfect 'squareness', and then tighten the fasteners finally. Alternately a simple assembly jig could be used. This would be true of any such extrusion-based or unistrut-based job.

Although we illuminate small faults, we are very satisfied with the miner kit. It's well-thought out and the value is excellent. Our staff engineer lamented only that it is not of rackmount proportions, since almost everything else around here is in racks. He described a layout in a 2U package.

Next will be assembly of the card cage to fit inside the frame.


one of these things is not like the other..


Skywire Miner at Bunker of DOOM: Hardware for the Next Internet
(2018 03 21)

This round, the card cage was started. Unfortunately, our print out of the instructions did not clearly show all the graphics and we got stopped until the relevant manual pages can be reprinted. The affected pages are those which show a 'ghost' image of a previous step with new items to be added to it. This is our fault in printing and not due to the directions.

One thing we would have liked to see is the inclusion of 'cut washers' (also called lockwashers) for all of the hardware that passes through the plexiglass panels.

It is well known that, over a long time, a too-tight fastener through plexiglass can cause it to crack, yet it is necessary to make these little screws tight enough to not work loose against the slick plexiglass.

While this skyminer may be a somewhat ephemeral device, who knows but that in the distant future it may be something to display historically just as early bitcoin miners will be, and old computers have become. Let's keep it nice!

Using cut washers would allow a lower amount of torque to be applied to the aforementioned fasteners and yet still prevent loosening over time. In lieu of cut washers and having no 'loctite' type of product at hand except the Red permanent threadlocker, we have put a tiny amount of "WET 'N WILD CLEAR NAIL PROTECTOR" on 3 or 4 threads of each fastener. This substance is a sort of paint-on liquid plastic. It works decently in place of "loctite" removable thread lock for this kind of very small hardware attachment. It is much more viscous than Loctite Blue and a very small amount is plenty. Your mileage may vary and bunkerofdoom.com can not recommend subtitutions of this kind for liability and suitability reasons.

Next will be completing the assembly of the card cage and power supply mounting.


This project also marks an equipment upgrade at bunkerofdoom.com. We have retired our beloved old Kodak P850 camera after 8 years and over 30,000 images. Starting with this Skywire Miner project, images and videos will be created (as much as practical) with a Canon SX730HS 'point and shoot' camera. It has a 40x optical zoom lens and a 20MP 1/2.3 inch sensor. The other choice for the same cost was the Canon PowerShot G9X with a 20MP 1" sensor but having only 3x optical zoom.

For our work, we need a large zoom range and enough pixels to crop severely while keeping good results, and there is usually enough light. The 'small' (for the photography pros now scoffing at our choice) sensor in the SX730HS is more sensitive and less noisy than the slightly smaller sensor in the 8 year old Kodak P850 due to technology advancements over 8 years.

The Kodak has an excellent lens and 5MP of relatively large pixels with good sensitivity (in the day of its technology), but has become impossible to maintain due to parts unavailability. Ultimately the flashlamp and the internal backup battery have failed, as well as the wearing out of our three Li-ion batteries. We received excellent value from the Kodak product.

We would absolutely buy Kodak again, or any number of the better point-and-shoot camera brands, but the SX730 was on sale and the persons at Garland Camera, Repair & Photographic Imaging were very helpful in discussing the technical aspects that would let us get the close-ups, videos, and light sensitivity needed for our specific application.

The Kodak will be repurposed as a good quality video camera, as it has the needed NTSC video output connector and a 120V-operated power supply, and still captures high resolution digital images. It may be integrated into an X-ray c amera we are hacking together. Time will tell.